
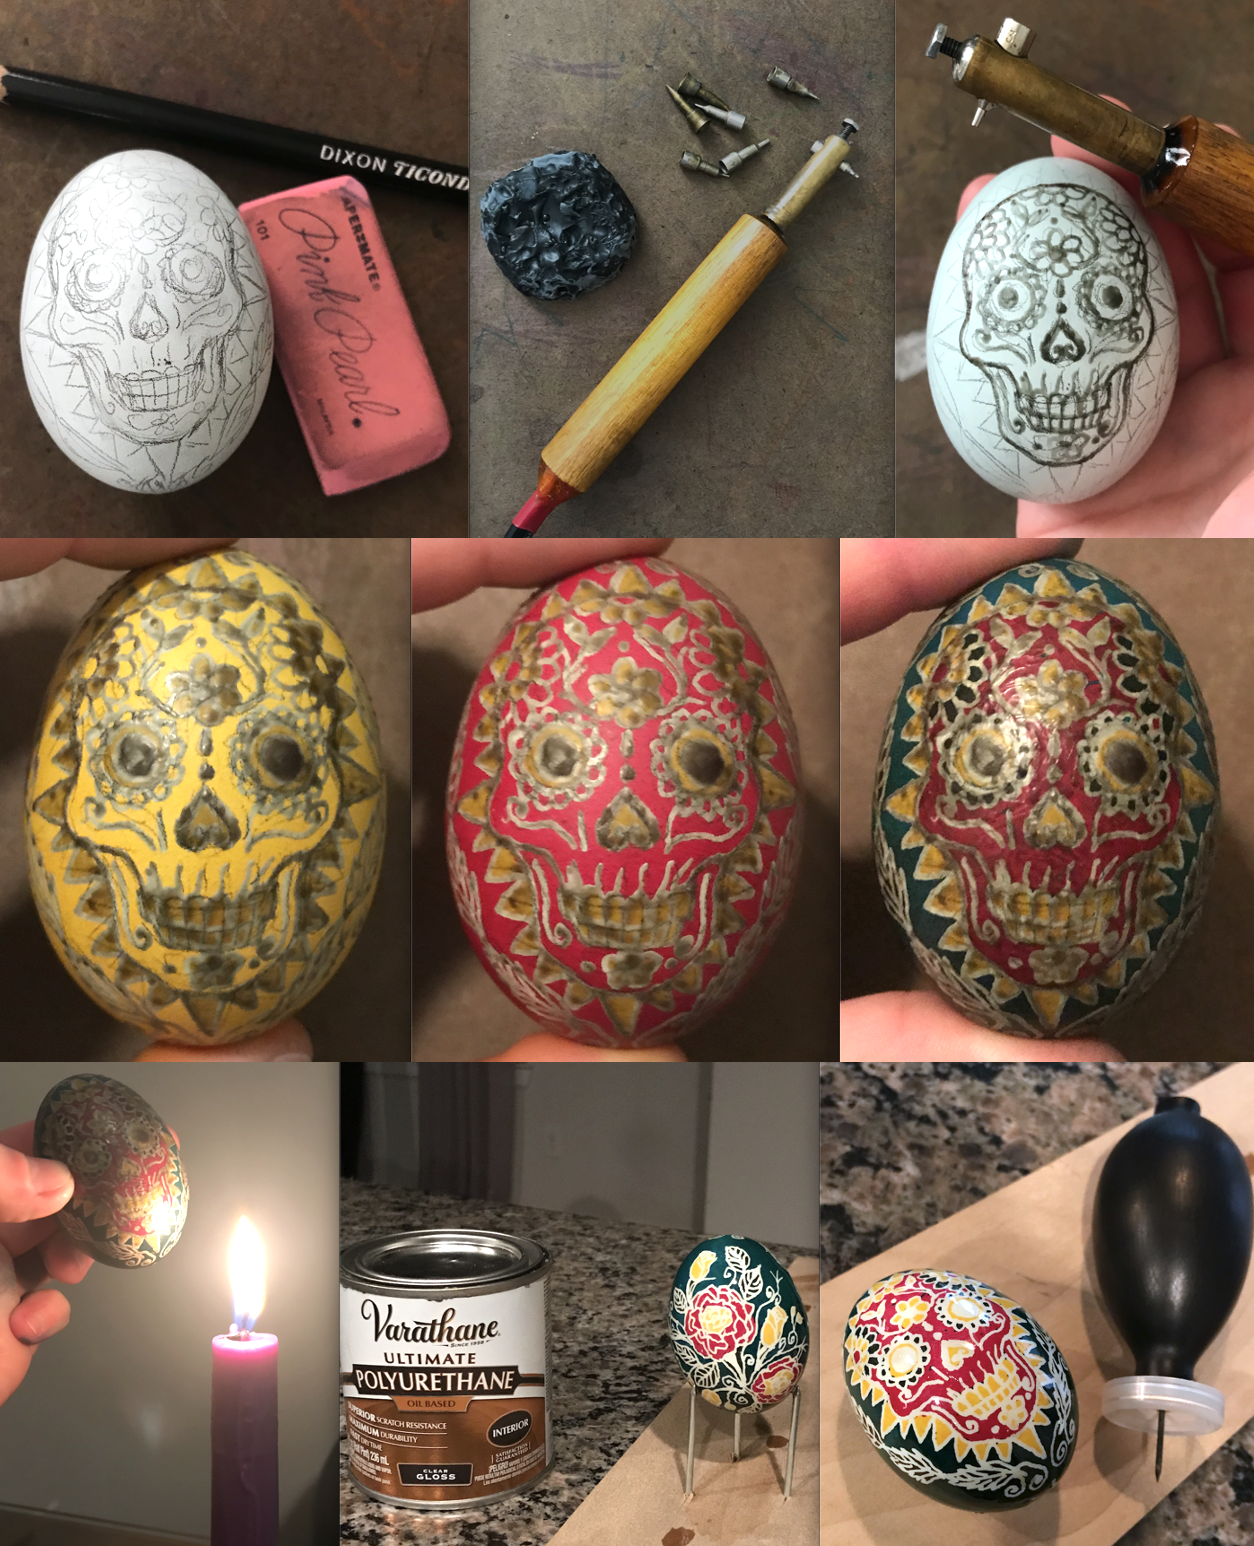
I wanted to share the steps I go through to create a pysanka!
- I select an egg (I’ve found “small batch” free range to be better, because they have thicker shells), then I draw my design lightly with pencil.
- I use an electric kistka to melt and dispense beeswax. There are several different tips you can use for the kistka with different aperture sizes. The tip is shaped like a funnel, and when it is heated you can scoop up the wax and begin tracing on the egg.
- The egg is shown with my first layer of wax, before submerging it in dye. All of the areas covered in wax will be white like the underlying egg.
- After the first dye application! Dyes should be applied from light to dark in sequential layers. Once I am satisfied with the shade of dye, I then apply more wax to certain areas (in this case, areas I wanted to be yellow in the final product).
- Added a layer of hot pink over the yellow.
- After waxing over the areas I wanted to be pink, I added a layer of turqouise dye.
- When I am finished with dyeing the egg, I melt the wax over a flame to see how the colors turned out. This is my favorite part! It’s kind of like unwrapping a present.
- I then apply a clear coat of varnish and leave it to dry overnight.
- The final step is “blowing” the egg. I always take pictures before this step, because you never know if you might break the shell! Using a special tool, I bore small holes at the top and bottom of the egg. Then I squeeze the rubber bulb, which introduces pressure inside the egg and forces the contents out of the bottom hole. I also flush the egg with water at the very end so it is completely empty and clean. Now the pysanka is complete!
